This post will guide you on how to add authentication to a VueJS app with SuperTokens using your own UI. We will be building our own authentication forms and will be using supertokens-web-js to make those forms work.
What is SuperTokens?
SuperTokens is an open source project that lets you add authentication to your app quickly. It offers various authentication methods (called recipes).
Alongside a prebuilt UI, it also offers a vanilla JS SDK called supertokens-web-js that you can use to build your own UI. In this tutorial we’ll learn how to use the supertokens-web-js to add authentication to a VueJS application. We’ll focus on the email password and social login flow, but you can choose another auth method as well.
Architecture
SuperTokens is built out of three components:
- Frontend SDK
- Backend SDK
- A microservice that talks to a database (called the SuperTokens Core).
We’ll build our own login, signup and reset password forms. Then we’ll use the supertokens-web-js SDK in our Vue app to make these forms functional by invoking the relevant functions for each action. These functions will interact with the APIs exposed via the SuperTokens SDK that is integrated into your backend layer.
For the backend we’ll use the supertokens-node SDK. The APIs exposed by this SDK will further talk to the SuperTokens Core to read/write information to the database.
The SuperTokens core service can be either self hosted (and connected to your own db), or be hosted by the team behind SuperTokens (sign up on supertokens.com). In the blog, we will be using a free, demo version of the core hosted on https://try.supertokens.com
Frontend
Start by creating a new Vue app:
npm init vue@latest
We’ll enable Vue Router and Typescript for the project. Choose yes for them in the prompt:
✔ Project name: … <your-project-name>
...
✔ Add TypeScript? … Yes
✔ Add Vue Router for Single Page Application development? … Yes
...

Scaffolding project in ./<your-project-name>...
Done.
Once that’s done, head inside the project and install the following dependencies:
npm i supertokens-node supertokens-web-js cors dotenv express npm-run-all
The supertokens-web-js library will be used on the frontend to add authentication and reset password functionality to your custom UI and the supertokens-node library will be used on the backend to expose the auth API routes.
Call the supertokens-web-js init function
We’ll initialize the supertokens-web-js SDK in our Vue app’s root file, i.e. /src/main.ts:
import ThirdPartyEmailPassword from "supertokens-web-js/recipe/thirdpartyemailpassword";
import Session from "supertokens-web-js/recipe/session";

SuperTokens.init({
    appInfo: {
        appName: "SuperTokens Vue ThirdPartyEmailPassword Example",
        apiDomain: "http://localhost:3001",
    },
    recipeList: [ThirdPartyEmailPassword.init(), Session.init()],
});
In the above code, the init function initializes supertokens-web-js on the frontend. We call this function in the root file of our application, so that we can use the session management feature across the entire application. It also indicates the type of authentication we want to use - in our case, it’s social login + email password (ThirdPartyEmailPassword recipe).
Create AuthView HTML template
Now we’ll start by creating the HTML template that renders the signup and signin UI. As an example, you can refer this HTML template.
The template file calls the following functions to handle social login and signup/login using email and password:
onGithubPressed: This function allows users to authenticate via their Github accountonGooglePressed: This function allows users to authenticate via their Google accountonSubmitPressed: This function is fired when the user enters their email and password to signup or login.
Create AuthView state and template functions
We’ll render this HTML template in an AuthView component inside /src/views/AuthView.vue which will also contain the implementations for the above functions:
<template src="../html/authView.html"></template>
We’ll start by creating states to store the data for authentication such as the email, password, error messages for our template:
// ...
data() {
    return {
        // we allow the user to switch between sign in and sign up view
        isSignIn: true,

        // this will store the email and password entered by the user.
        email: "",
        password: "",

        // any generic error states
        error: false,
        errorMessage: "Something went wrong",

        // any error states specific to the input fields.
        emailError: "",
        passwordError: "",
    };
}
Then we will create a signIn function which will use the supertokens-web-js SDK. We’ll pass the email and password to this method and redirect the user to the "/" route if authentication is successful. This signIn function will be called from the onSubmitPressed function if the isSignIn state is true.
signIn: async function (_: Event) {
    const response = await ThirdPartyEmailPassword.emailPasswordSignIn({
        formFields: [
            {
                id: "email",
                value: this.email,
            },
            {
                id: "password",
                value: this.password,
            },
        ],
    });
    if (response.status === "WRONG_CREDENTIALS_ERROR") {
        // the input email / password combination did not match,
        // so we show an appropriate error message to the user
        this.errorMessage = "Invalid credentials";
        this.error = true;
        return;
    }
    if (response.status === "FIELD_ERROR") {
        response.formFields.forEach((item) => {
            if (item.id === "email") {
                // this means that something was wrong with the entered email.
                // probably that it's not a valid email (from a syntax point of view)
                this.emailError = item.error;
            } else if (item.id === "password") {
                this.passwordError = item.error;
            }
        });
        return;
    }
    // login is successful, and we redirect the user to the home page.
    // Note that session cookies are added automatically and nothing needs to be
    // done here about them.
    window.location.assign("/");
}
If the status field in the response body is "FIELD_ERROR", and the id is "email", it implies that the user entered a string that failed the email validation on the backend (most likely because it is not a valid email). So we store the error state and display the error message on the UI to the user. Here’s an example of how you can make the error message appear underneath the email field:
Similarly, signUp method where we invoke the emailPasswordSignUp function from supertokens-web-js to handle the sign up flow.
For social login, we’re using Google and Github authentication providers. When the onGithubPressed or onGooglePressed functions are called, we call the getAuthorisationURLWithQueryParamsAndSetState method and pass the provider name in the parameters. We also provide a callback URL as authorisationURL parameter that the providers will redirect back to after the authentication process is completed. In our example, we use http://localhost:3000/auth/callback/google for Google and http://localhost:3000/auth/callback/github for GitHub.
These URLs needs to be configured on the provider’s dashbaord as well.
Here are the functions for Github and Google respectively:
onGithubPressed: async function () {
    const authUrl = await ThirdPartyEmailPassword.getAuthorisationURLWithQueryParamsAndSetState({
        providerId: "github",

        // This is where github should redirect the user back after login or error.
        // This URL goes on the github dashboard as well.
        authorisationURL: "http://localhost:3000/auth/callback/github",
    });

    window.location.assign(authUrl);
},

onGooglePressed: async function () {
    const authUrl = await ThirdPartyEmailPassword.getAuthorisationURLWithQueryParamsAndSetState({
        providerId: "google",

        // This is where google should redirect the user back after login or error.
        // This URL goes on the google dashboard as well.
        authorisationURL: "http://localhost:3000/auth/callback/google",
    });

    window.location.assign(authUrl);
}
After the user has finished authentication on the provider’s website, they are redirected to the http://localhost:3000/auth/callback/<provider> route. Here we call the thirdPartySignInAndUp function from supertokens-web-js which consumes the authorisation code (that is sent back from the provider) to sign in the user.
Here is the function that handles the above flow in the AuthCallbackView component inside /src/views/AuthCallbackView.vue file:
mounted: async function () {
    try {
        const response = await ThirdPartyEmailPassword.thirdPartySignInAndUp();

        if (response.status !== "OK") {
            // either the user did not complete the login process, or something else went wrong.
            return window.location.assign("/auth?error=signin");
        }

        // sign in successful.
        // The session tokens are handled automatically via our SDK.
        window.location.assign("/");
    } catch (_) {
        window.location.assign("/auth?error=signin");
    }
}
Setup Routing to Show the Signup/Login forms
Vue CLI already generates the initial routing for our app inside /src/router.index.ts.
We’ll update this file so that the /auth route loads the AuthView component and the /auth/callback/:provider route loads the AuthCallbackView component we created earlier:
import { createRouter, createWebHistory } from "vue-router";
import AuthView from "../views/AuthView.vue";

const router = createRouter({
    history: createWebHistory(import.meta.env.BASE_URL),
    routes: [
        {
            path: "/auth",
            name: "auth",
            component: () => AuthView,
        },
        {
            path: "/auth/callback/:provider",
            name: "authcallback",
            component: () => AuthCallbackView,
        }
    ],
});

export default router;
Backend Integration
You can see the backend quick setup section in our docs on supertokens.com, or even copy the code from our example app. As a summary:
- You need to initialize the
supertokens-nodeSDK and provide it therecipeList(similar to how you did on the frontend). - Then you need to setup
CORS, and add the SuperTokensmiddlewareanderrorHandlerto your app. The SuperTokensmiddlewareexposes all the auth related API routes (like sign in, sign up, sign out etc) to the frontend. - Finally, you need to provide the
connectionURI(location) of the SuperTokens core. To get started quickly, you can provide it"https://try.supertokens.com"(this is a core that we host for demo purposes).
Once you’ve successfully setup your server, you can now try and sign up on the frontend.
Session management
After authentication, we’ll render a HomeView component on the page inside /src/views/HomeView.vue. First, we’ll create the HTML template at /src/html/homeView.html:
<div v-if="session">
    <div class="fill">
        <div class="top-bar">
            <div class="sign-out" v-on:click="signOut">SIGN OUT</div>
        </div>
        <div class="fill home-content">
            <span class="home-emoji">🥳🎉</span>
            Login successful
            <div style="height: 20px" />
            Your user ID is <br />
            {{ `${userId}` }}
            <div style="height: 40px" />
            <div class="session-button" v-on:click="callAPI">CALL API</div>
            <div style="height: 30px" />
            ------------------------------------
            <div style="height: 40px" />
            <a
                href="https://github.com/supertokens/supertokens-web-js/tree/master/examples/vuejs/with-thirdpartyemailpassword"
                target="_blank"
                rel="noreferrer">
                View the code on GitHub
            </a>
        </div>
        <div class="bottom-banner">Vue Demo app. Made with ❤️ using supertokens.com</div>
    </div>
</div>
Then inside /src/views/HomeView.vue, we’ll check if the user is authenticated using the doesSessionExist method exposed by the Session recipe from the supertokens-web-js SDK.
For authenticated users, we render a logout button with information about their session. When a user clicks this button, we call the signOut method from supertokens-web-js which clears the user’s session.
For unauthenticated users, we can redirect them to the /auth page.
<script lang="ts">
import { defineComponent } from "vue";
import Session from "supertokens-web-js/recipe/session";
import ThirdPartyEmailPassword from "supertokens-web-js/recipe/thirdpartyemailpassword";

const apiPort = import.meta.env.VUE_APP_API_PORT || 3001;
const apiDomain = import.meta.env.VUE_APP_API_URL || `http://localhost:${apiPort}`;

export default defineComponent({
    data() {
        return {
            // if session is false, we show a blank screen
            // else we render the UI
            session: false,
            userId: "",
        };
    },
    methods: {
        signOut: async function () {
            await ThirdPartyEmailPassword.signOut();
            window.location.assign("/auth");
        },

        checkForSession: async function () {
            if (!(await Session.doesSessionExist())) {
                // since a session does not exist, we send the user to the login page.
                return window.location.assign("/auth");
            }
            const userId = await Session.getUserId();
            // this will render the UI
            this.session = true;
            this.userId = userId;
        },

        callAPI: async function () {
            const response = await fetch(`${apiDomain}/sessionInfo`);

            if (response.status === 401) {
                // this means that the session has expired and the
                // user needs to relogin.
                window.location.assign("/auth");
                return;
            }

            const json = await response.json();

            window.alert("Session Information:\n" + JSON.stringify(json, null, 2));
        },
    },

    mounted() {
        // this function checks if a session exists, and if not,
        // it will redirect to the login screen.
        this.checkForSession();
    },
});
</script>

<template src="../html/homeView.html"></template>
For the /auth route, we’ll redirect the user to the Home page if a session already exists:
checkForSession: async function () {
    if (await Session.doesSessionExist()) {
        // since a session already exists, we redirect the user to the HomeView.vue component
        window.location.assign("/");
    }
},
Finally, to load the HomeView component on "/" we’ll update the /src/router/index.ts file:
const router = createRouter({
    history: createWebHistory(import.meta.env.BASE_URL),
    routes: [
        {
            path: "/",
            name: "home",
            component: () => HomeView,
        },
        // ...
    ],
});

export default router;
If you now visit http://localhost:3000 after authentication, you should see the following page:
Forgot Password Flow
In the Sign In UI, we have a link to the forgot password page. On this page the user can enter their email and receive a password reset link in their inbox. When they visit that link, they can then enter their new password on that page to change their password.
First, we’ll create the HTML template inside /src/html/forgotPassword.html. Here is an example that you can use.
We’ll create a component inside /src/views/ForgotPassword.vue file where we will render the above template:
<template src="../html/forgotPassword.html"></template>
In the HTML template, we conditionally render a form, based on a variable called tokenPresent, which is a state variable representing if a password reset token has been generated or not. This tokenPresent variable is set based on the token present in the query parameters of the page’s URL. In the case where the user has clicked on the forgot password button (in the sign in page), there is no token present in the query parameters of the page’s URL, hence the tokenPresent variable is set to false.
Since tokenPresent is false, we render the form where the user will enter their email to get the reset password link. When the user enters their email on this form and submits it, we call the sendPasswordResetEmail method from supertokens-web-js and pass in their email. This function interacts with a backend API to send a password reset link on the user’s email, if that email exists in SuperTokens.
The password reset link is like http://localhost:3000/auth/reset-password?token=....&rid=thirdpartyemailpassword. This link has the same path as the forgot password page, however, since the URL has the token query parameter, it should render the form where the user can enter their new password.
When they enter their new password in the form, we call the submitNewPassword function with the new password. This function will automatically read the token from the URL and call the SuperTokens backend API to change the user’s password.
In case the password reset token was consumed already or has expired, the function call will return a non "OK" status and then we can show a message on the UI to prompt the user to go back to the login screen.
<script lang="ts">
import ThirdPartyEmailPassword from "supertokens-web-js/recipe/thirdpartyemailpassword";
import { defineComponent } from "vue";

export default defineComponent({
    data() {
        /**
         * If the URL has a token query param, it means that we should show the
         * "enter new password" screen, else we should ask the user for their email
         * to send the password reset link.
         */
        const urlParams = new URLSearchParams(window.location.search);
        const token = urlParams.get("token");
        return {
            // the email property is used for the enter email screen
            email: "",
            error: false,
            errorMessage: "Something Went Wrong",
            didSubmit: false,
            // if tokenPresent is true, it means that the user has clicked on the
            // reset password link.
            tokenPresent: token !== null,
            password: "",
        };
    },
    methods: {
        onSubmitClicked: async function () {
            if (this.tokenPresent) {
                // we try and change the user's password now by consuming the token
                try {
                    const response = await ThirdPartyEmailPassword.submitNewPassword({
                        formFields: [
                            {
                                id: "password",
                                value: this.password,
                            },
                        ],
                    });

                    if (response.status === "FIELD_ERROR") {
                        // this indicates that the password entered by the user
                        // did not match the backend password validation logic.
                        throw new Error(response.formFields[0].error);
                    } else if (response.status === "RESET_PASSWORD_INVALID_TOKEN_ERROR") {
                        // the password reset token was consumed already, or has expired.
                        // in this case, the user should go back to the login screen or the
                        // enter email screen
                        throw new Error("Password reset token has expired, please go back to the sign in page");
                    }

                    // password reset successful.
                    window.location.assign("/auth");
                } catch (e: any) {
                    this.errorMessage = e.message;
                    this.error = true;
                }
            } else {
                // the user has entered an email for whom the password reset link
                // will be sent.
                try {
                    const response = await ThirdPartyEmailPassword.sendPasswordResetEmail({
                        formFields: [
                            {
                                id: "email",
                                value: this.email,
                            },
                        ],
                    });

                    if (response.status !== "OK") {
                        // this means that the email validation logic failed.
                        throw new Error(response.formFields[0].error);
                    }

                    // a password reset email was sent successfully.

                    if (this.didSubmit !== true) {
                        // we change the UI to show that the email has been sent
                        this.didSubmit = true;
                    }
                } catch (e: any) {
                    this.errorMessage = e.message;
                    this.error = true;
                }
            }
        },
    },
});
</script>
If the submitNewPassword function is successful, it means the user’s password has been successfully reset and we redirect the user back to the /auth page so they can now login with their new password.
To load the ForgotPassword component on the route /auth/reset-password, we’ll make the following changes in the /src/router/index.ts file:
const router = createRouter({
    history: createWebHistory(import.meta.env.BASE_URL),
    routes: [
        // ...
        {
            path: "/auth/reset-password",
            name: "resetPassword",
            component: () => ForgotPasswordView,
        },
    ],
});
Once you do that, if you now visit
If you enter your email and press the “Email Me” button, you should receive a link to reset your password on the entered email:
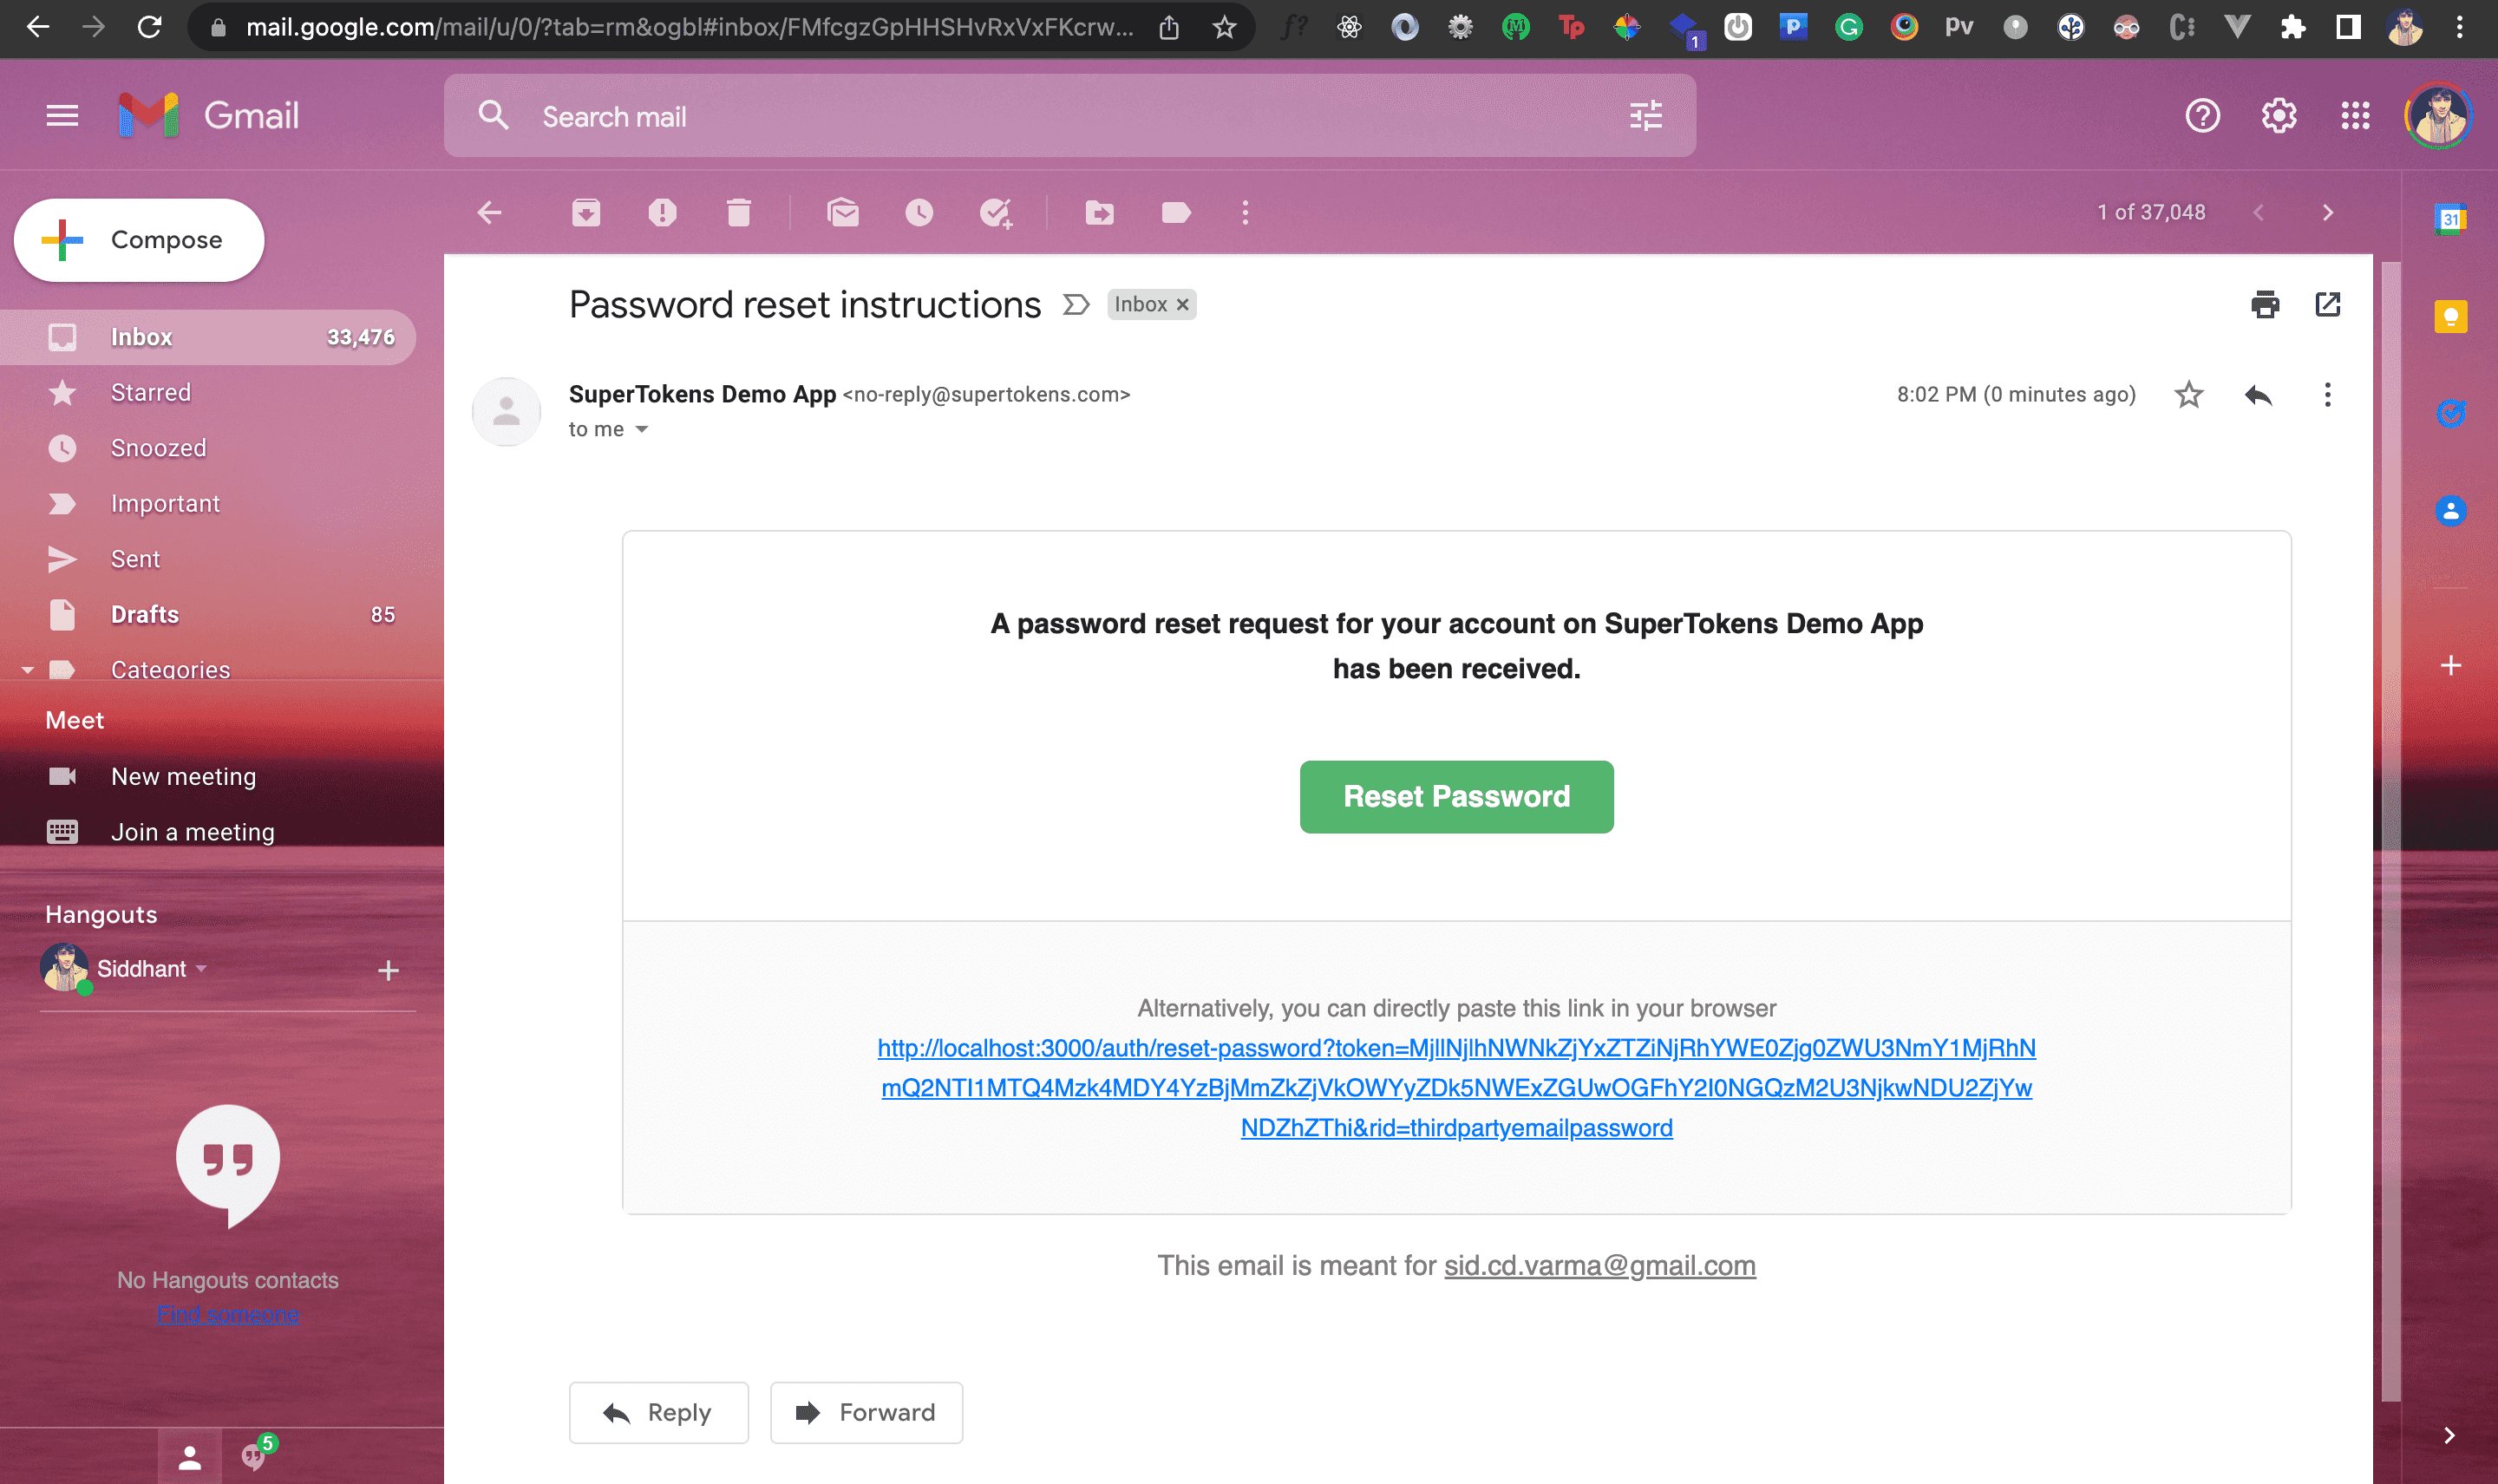
After clicking the link, you can enter your new password and hit the “Change Password” button to update your password:
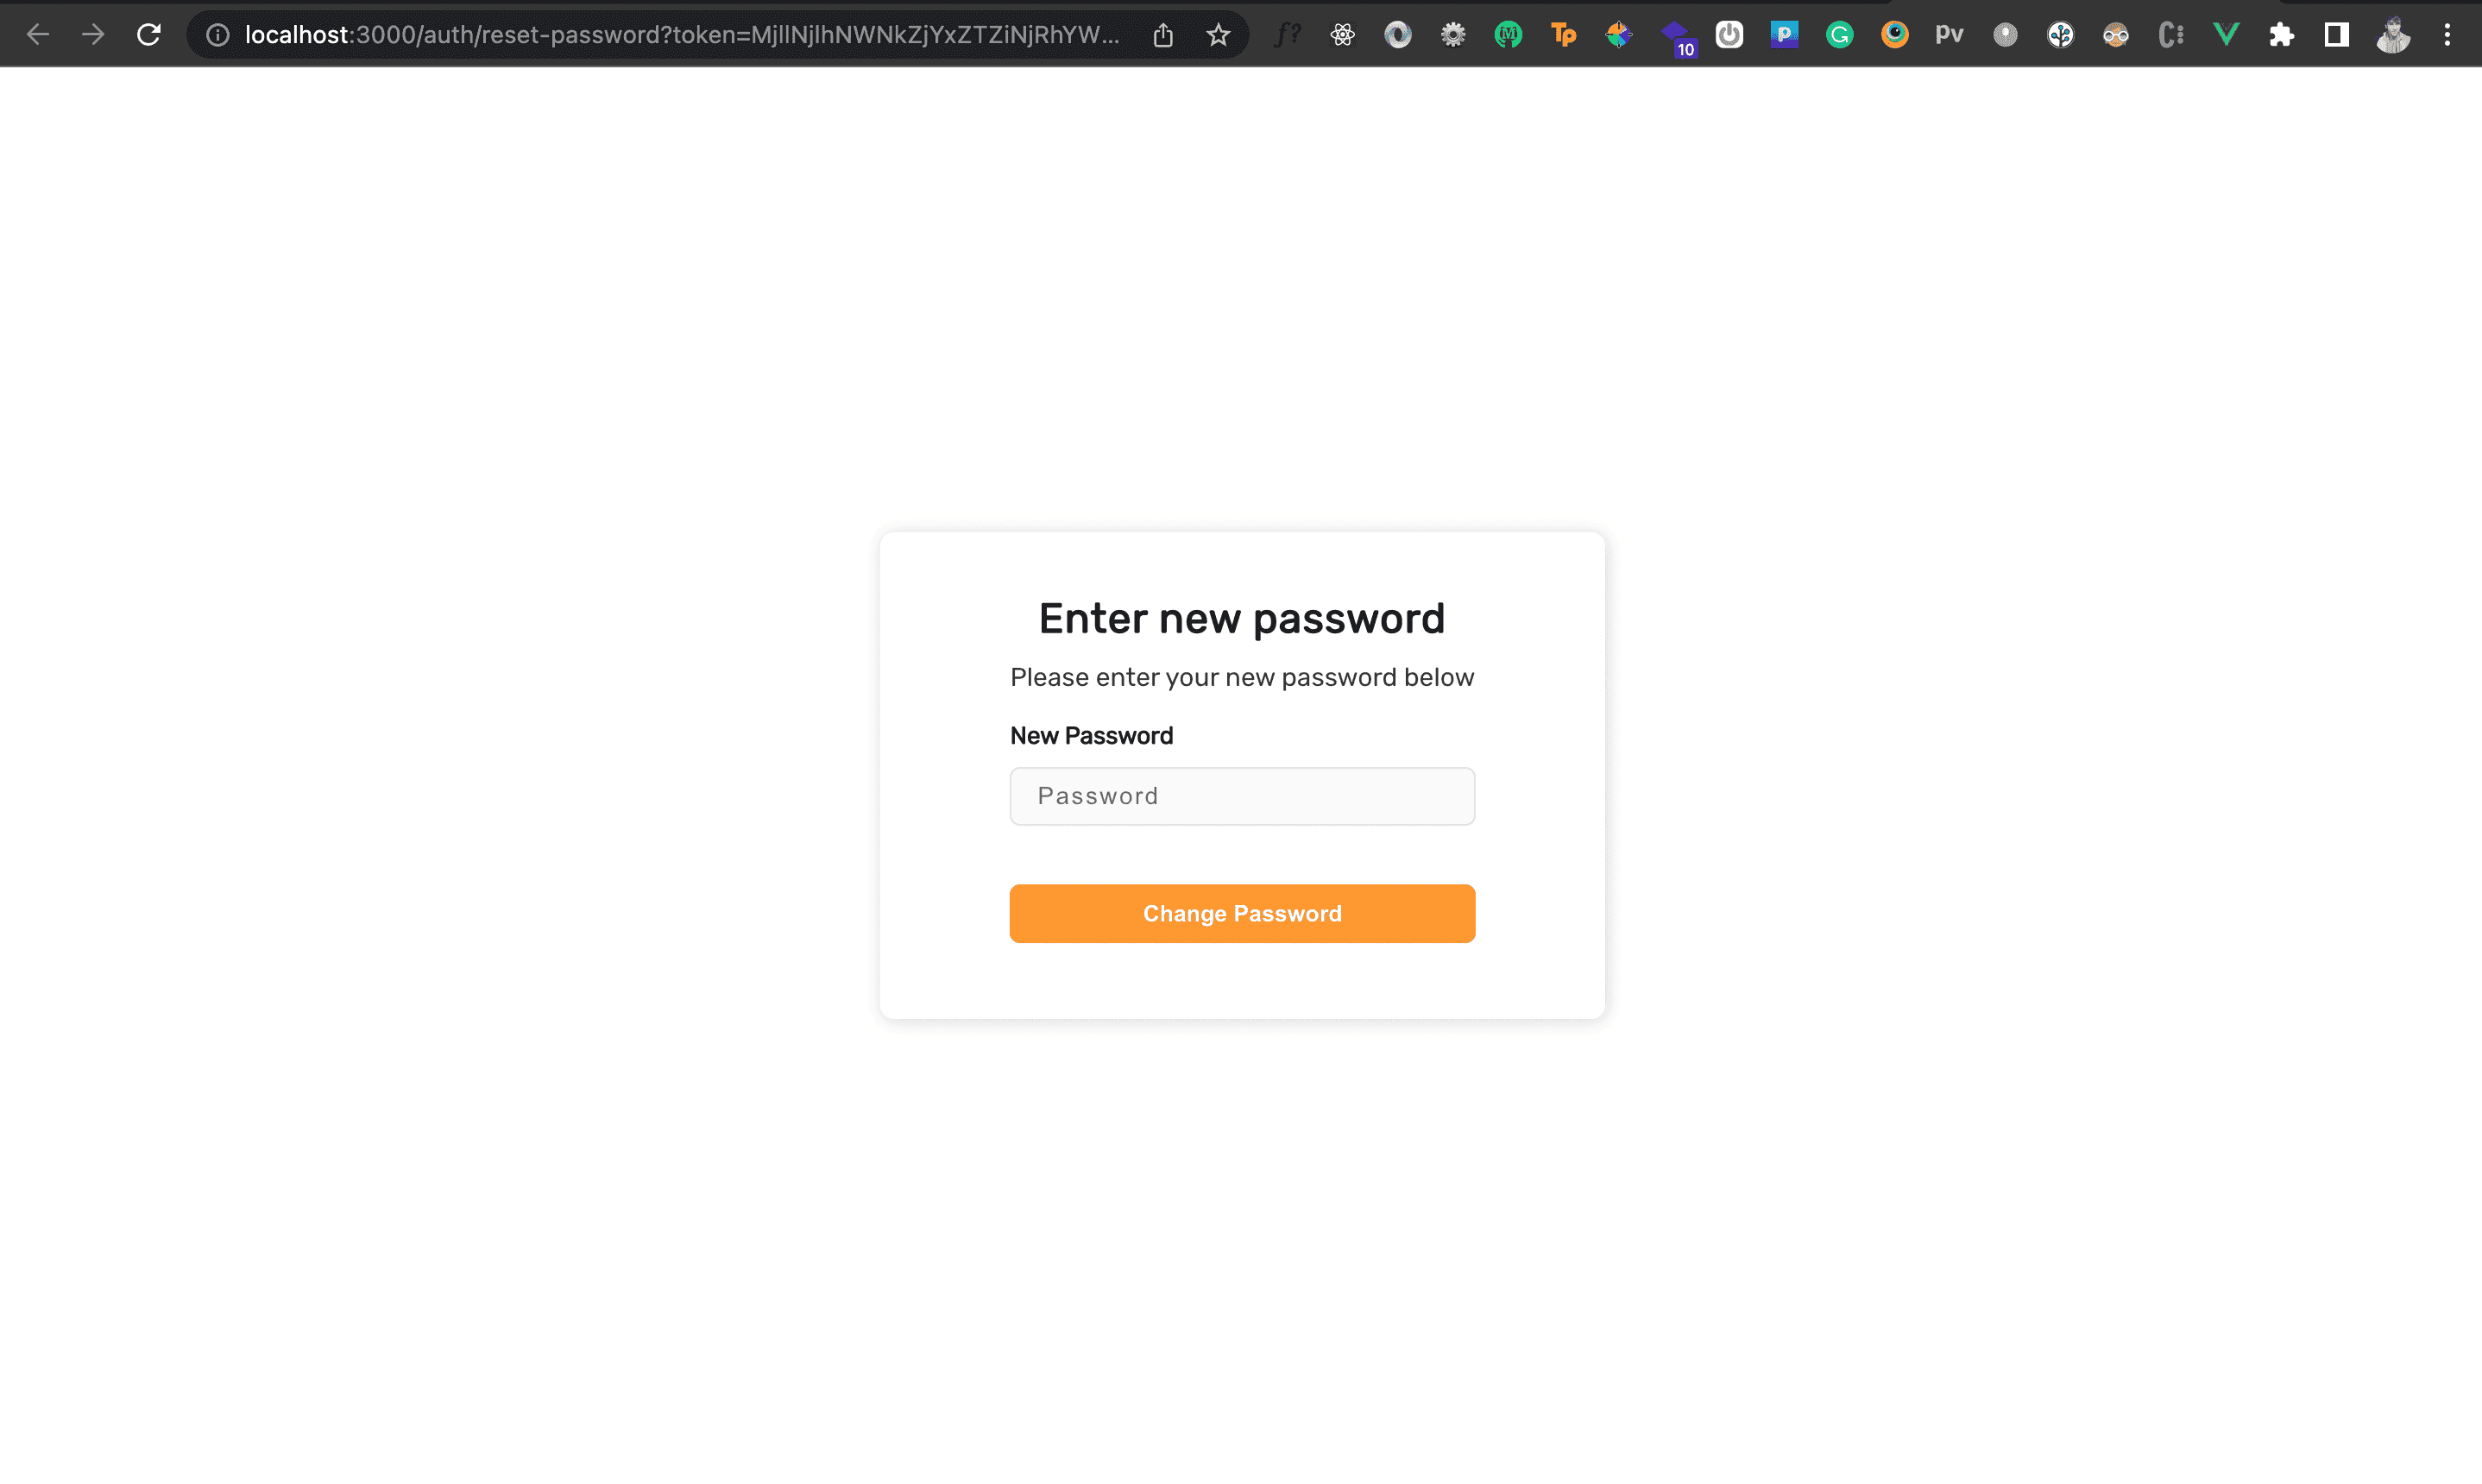
Supertokens Core Setup
Whilst doing the backend setup, we are using "https://try.supertokens.com" as the connectionURI for the core. This is a demo core instance hosted by the team of SuperTokens. You can use this for as long as you like, but when you are committed to using SuperTokens, you should switch to a self hosted or a managed version of the core.
Conclusion
We used the supertokens-web-js SDK to add email password and social authentication along with the forgot password functionality to a Vue app. Useful links:
Written by the Folks at SuperTokens — hope you enjoyed! We are always available on our Discord server. Join us if you have any questions or need any help.
Also published here.