Now that we all spend so much time in video conferencing either for work or life, it is critical to make yourself look and sound the best to your colleagues, family and friends. It is not only about self image, but also about having the “real” you projecting the maximum presence remotely. In this article, I would like to introduce a few simple steps to improve your look and sound in video conferencing tools.
Why should you trust me?
I’m the co-founder of a small but global company, and over the last two years I have spent more than 1,000 hours on Zoom video conferences, webinars, video AMA (Ask Me Anything), YouTube interviews, and more. What I have learned can potentially save you money, time, and headaches.
Main Areas for improvement
Before we jump into the practical details of improving your look and sound, let’s first examine the main areas for improvement.


Light
Regardless what kind of webcam you have, they all crave for better lighting so each pixel can show its best. The general recommendation here is more light and softer light. And avoid strong backlight!
Sound
According to a study on youtube, viewers will be more likely to stop watching a video clip because of poor sound than poor video quality. To improve your sound, the key is to get the microphone as close to your mouth as possible. In addition, find ways to reduce the ambient noise.
Software, Gear, and other considerations
Today’s video conferencing tools are quite powerful and often have advanced settings that can improve your video and sound quality. And the key is to find them and configure them properly. A few clicks can make a world of difference, and for free.
Gears do matter, but not as much as you might think. There are webcams, video lights and microphones at different budget levels that can boost your video conference quality to the next level. $100 microphone will sound dramatically better than a $5 headset, but beyond that there will be diminishing returns.
In addition, think about how to improve your surroundings to make it less cluttered and more inviting. After all, better work and living space will make us happier and more productive, with and without the video conferencing.
Simplest solution that cost next to nothing
To achieve a much better look and sound, it does not have to cost a fortune and a computer engineer to set up. Here are the recommended simple solutions that do not require buying new equipment.
Solution for light:


Natural light: During the day, try to find a north facing window or a large window without direct sunlight. Try to avoid strong light in your back, which will result in “witness protection” type of image with a very dark face.
Artificial light: use a desk lamp or an accent light to add more light to your face. A dimmable light will be ideal, but you can also move the light to and away from you to adjust the amount of light.
Use diffusion: use household white fabric to soften the main light you have. Some examples are: semi-transparent window curtain, shower curtain, a large white shirt, parchment paper, white bed sheets. But always be careful about safety and don’t catch fire by draping paper on hot bulbs!
Bonus: add some fill light on the other side of your main light, to brighten up the shadows of your face. The fill light should be less bright than the main light.
Solution for sound:
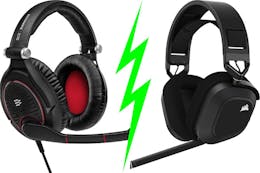
Use any headset that has a microphone boom that is as close to your mouth as possible. Options are:
- A wired or wireless headphone with a boom microphone are the best choice
- Earbuds with microphone are second best, for example, your inexpensive iPhone earpods with remote and mic.
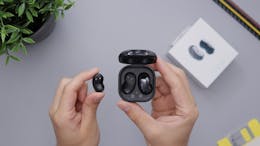
- Airpod and wireless earbuds, although very convenient, offers lesser audio quality
- Your microphone on your laptop is probably the worst, and should be used as the last resort.
Solution for software, gear and other considerations
Software: Enable HD and image enhancements in your video conference settings. For example, below is where you find the settings for Zoom.


Position your camera: in general, a higher camera angle compliments your look. When you work on your laptop, your camera often looks “up” which might present a double-chin effect. This can be easily rectified by:
- Adding a stack of books under your laptop
- Use one of the laptop stands like the Rain Design mStand or cheaper foldable alternatives
Gear: Your webcam on your laptop might be quite good already, for example the HD camera on most Macbook Pros. But a dedicated webcam, e.g. Logitech C920/C920S can certainly improve video quality further. You can also convert your existing dSLR, mirrorless camera, or even your older smartphone into a webcam.
Intermediate solution: $500 budget
If you do a lot of video conferencing and your professional appearance is critical for your business, investing $500 is really a sweet spot in terms of how much quality improvement you can get in proportion to your investment.

Solution for light $100
- Add a bright light: 18-19” LED ring light with diffuser, light stand and camera mount
- Optional: use a reflector or a second smaller light for fill light or hair light
Solution for sound $100
- Add a USB microphone: Audio Technica AT2005USB; Samson Q2U, which will dramatically improve your sound quality especially if your house is quite noisy (e.g. kids running and screaming anyone?) or quite echoish.
- If you prefer a bit more mobility and your room is reasonably quiet, a USB speakerphone such as a Jabra 410 can make your bedroom sound like a boardroom.
Solution for software, gear and others: $200
- Better webcam: you might want to invest in a good HD webcam such as the hugely popular Logitech C920S, as well as other alternatives.
- Connect your dSLR or mirrorless camera (assume you already own one): via USB and software, or via HDMI capture card (Elgato Cam Link 4K)
Advanced solution
To get a YouTube studio quality setup, you might need to invest a bit more but the return on investment will be diminishing. Since there are so many options out there, I only list a few equipment I have used while adding a few recommended YouTube channels if you want to learn more.


Solution for light:
Kit 1: $300
- LED panel light: Aputure Amaran HR726
- Reflective or white shine through umbrella like this: White umbrella
Kit 2: $1000
- Hard main light: Aputure LS120D II
- Light dome and grid: Aputure Light Dome II
In addition, you can experiment with colorful flood lights as well as interesting accent lights (screensavers, Philips Hue lights, lava lamps, NEON signs, home-made light fixtures, holiday lights, and more).
Solution for sound:
- A better microphone ($100-400): Rode Pod Mic, Rode VideoMic NTG, Shure SM7B
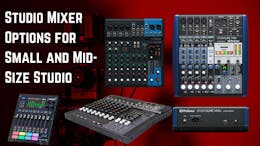
- A USB audio interface and/or recorder ($100-600): Motu M2, Tascam DR-60D MkII, Rode Rodecaster Pro
- Better mic stand or scissor arm ($100): Rode PSA-1, Tripod Mic Stand
Solution for software, gear and others
- Invest in a new mirrorless camera that works well for streaming ($350-2000), like Canon M50 or Nikon Z6. They are versatile for digital photos, on-location video, as well as video conferencing. You might also want to invest in a brighter lens, which will create that sharp face with dreamy blurry background effects.
- HDMI capture card like Elgato cam link 4K, or a video switcher like Blackmagic Atem Mini if you have multiple video cameras for different angles.
- A sturdy tripod or
- Learn to use software like OBS that can enhance your video feeds
Summary


By the end of this pandemic, we might all grow a bit more facial hair and sound a bit tired. By following some of the simple steps in this article, you might project a better presence for yourself, your friends, family and colleagues. Stay safe!
For more information
To learn more, I recommend the following YouTube videos:
As well follow some of these channels: