


I'm continuing my series on running the test suite for each Pull Request on Kubernetes. In the previous post, I laid the groundwork for our learning journey: I developed a basic JVM-based CRUD app, tested it locally using Testcontainers, and tested it in a GitHub workflow with a GitHub service container.
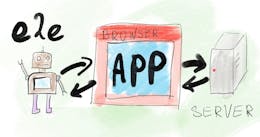
This week, I will raise the ante to run the end-to-end test in the target Kubernetes environment. For this, I've identified gaps that I'll implement in this blog post:
- Create and configure a Google Kubernetes Engine instance
- Create a Kubernetes manifest for the app, with Kustomize for customization
- Allow the GitHub workflow to use the GKE instance
- Build the Docker image and store it in the GitHub Docker repo
- Install the PostgreSQL Helm chart
- Apply our app manifest
- Finally, run the end-to-end test
Stages 1, 2, and 3 are upstream, while the workflow executes the latter steps for each PR.
As I had to choose a tech stack for the app, I had to select a Cloud provider for my infrastructure. I choose Google Kubernetes Engine because I'm more familiar with Google Cloud, but you can apply the same approach to any other provider. The concept will be the same, only the implementation will differ slightly.
Building and storing the image
Regardless of your target infrastructure, you must build the app's image. I won't use anything fancy. For this reason, I'll only comment on the workflow steps:
jobs:
  build:
    runs-on: ubuntu-latest
    permissions:
      contents: read
      packages: write
      id-token: write
    env:
      REGISTRY: ghcr.io
      IMAGE_NAME: ${{ github.repository }}
      DOCKER_BUILD_RECORD_RETENTION_DAYS: 1                                   #1
    steps:
# Other steps described in the previous post
      - name: Set up Docker Buildx
        uses: docker/setup-buildx-action@v3                                   #2
      - name: Log into registry ${{ env.REGISTRY }}
        uses: docker/login-action@v3                                          #3
        with:
          registry: ${{ env.REGISTRY }}                                       #4
          username: ${{ github.actor }}                                       #5
          password: ${{ secrets.GITHUB_TOKEN }}                               #6
      - name: Extract Docker metadata
        id: meta                                                              #7
        uses: docker/metadata-action@v5
        with:
          images: ${{ env.REGISTRY }}/${{ env.IMAGE_NAME }}
          tags: |
            type=raw,value=${{github.run_id}}                                 #8
      - name: Build and push Docker image
        uses: docker/build-push-action@v6                                     #9
        with:
          context: .
          tags: ${{ steps.meta.outputs.tags }}                               #10
          labels: ${{ steps.meta.outputs.labels }}                           #10
          push: true
          cache-from: type=gha
          cache-to: type=gha,mode=max
- For the demo, let's keep the image only for a short period
- BuildX is not necessary, but it makes the push step later more straightforward
- Login into the registry to push later
- Not necessary, but I'm using an environment variable for reuse and easier change
- Login with the user running the workflow
- The password is part of the built-in secrets, so we don't need to set it in a sub
envblock explicitly - This step allows computing the version tag. We set an explicit step
idto reuse in the next step - Set the GitHub run ID for debugging purposes
- Build and push
- Use the tags and labels we generated in the previous step. The
tagspart is necessary for later stages; thelabelspart is a nice plus. Notice that we use themetaid of the previous stage
Sizing the cluster
Sizing the cluster can be a real challenge or a no-brainer.
If you want to walk the real challenge road, guess the number of possible parallel runs, guess how many resources you need for each, sum them, add a security factor, and you're good to go. As you can imagine, it's probably not that easy. From this point on, you have two options. You can start with too much and downsize to optimize your costs, or you can start with too low and upsize to make things work. I expect the latter approach won't make you many friends in development teams.
The no-brainer road is to use an autoscaler. For example, the GKE offers a built-in one.
In the context of this blog post, I chose the challenging road, and because I had no dev team but myself, I started low and upsized. Assuming you have enabled the Kubernetes Engine API, the following command creates a "minimal cluster" in my context of a single PR:
time gcloud container clusters create "minimal-cluster" \
  --project "vcluster-pipeline" \
  --zone "europe-west9" --num-nodes "1" \
  --node-locations "europe-west9-a" --machine-type "e2-standard-4" \
  --network "projects/vcluster-pipeline/global/networks/default" \
  --subnetwork "projects/vcluster-pipeline/regions/europe-west9/subnetworks/default" \
  --cluster-ipv4-cidr "/17" --release-channel "regular" \
  --enable-ip-alias --no-enable-basic-auth --no-enable-google-cloud-access
You'll probably need to change your zone—I'm in Europe. Note that I'm using a single node to reduce costs further: don't do this in real-world scenarios! Kubernetes clusters have multiple nodes for a reason.
The above command produces the following output:
Creating cluster minimal-cluster in europe-west9... Cluster is being health-checked (Kubernetes Control Plane is healthy)...done.
Created [https://container.googleapis.com/v1/projects/vcluster-pipeline/zones/europe-west9/clusters/minimal-cluster].
To inspect the contents of your cluster, go to: https://console.cloud.google.com/kubernetes/workload_/gcloud/europe-west9/minimal-cluster?project=vcluster-pipeline
kubeconfig entry generated for minimal-cluster.
NAME: minimal-cluster
LOCATION: europe-west9
MASTER_VERSION: 1.30.6-gke.1125000
MASTER_IP: 34.163.89.138
MACHINE_TYPE: e2-micro
NODE_VERSION: 1.30.6-gke.1125000
NUM_NODES: 1
STATUS: RUNNING

real    5m21.822s
user    0m3.434s
sys     0m0.224s
Astute readers may have noticed that I used the Linux time command to wrap the cluster instance creation. For experimentation purposes, I ran the command several times. The time it takes to create a cluster ranges from 5 to 7 minutes.
We could create the cluster from within the GitHub workflow, but please bear with me and keep this duration in mind. Now that we created the cluster, we need to use it from within the GitHub workflow: it requires setting up authentication.
Authenticate on Google Cloud from a GitHub workflow
We must interact with the GKE instance to at least install our app. Since we are inside a GitHub workflow, we will need to authenticate. Fortunately, the google-github-actions/auth GitHub Action can help us:
This GitHub Action authenticates to Google Cloud. It supports authentication via a Google Cloud Service Account Key JSON and authentication via Workload Identity Federation.
The action offers three authentication alternatives:
-
Direct Workload Identity Federation
In this setup, the Workload Identity Pool has direct IAM permissions on Google Cloud resources; there are no intermediate service accounts or keys. This is preferred since it directly authenticates GitHub Actions to Google Cloud without a proxy resource.
-
Workload Identity Federation through a Service Account
In this setup, the Workload Identity Pool impersonates a Google Cloud Service Account which has IAM permissions on Google Cloud resources. This exchanges the GitHub Actions OIDC token with a Google Cloud OAuth 2.0 access token by granting GitHub Actions permissions to mint tokens for the given Service Account. Thus GitHub Actions inherits that Service Account's permissions by proxy.
-
In this setup, a Service Account has direct IAM permissions on Google Cloud resources. You download a Service Account Key JSON file and upload it to GitHub as a secret.
The authors tag option one as preferred; however, the returning token has a maximum lifetime of 10 minutes. It might be too close to the limit for some workflows. Option three is a security risk, as the JSON file never expires. Because of this, I chose the second option, which I already advocated for in the past.
Configuring the GKE instance with a Service Account and a Workload Identity Pool is a process that requires a couple of different objects to create. Since it can help me in the future, I wrote it for reference. If you're familiar with it, feel free to skip it.
Here are the steps:
-
If you haven't done it yet, enable the Credentials API.
gcloud services enable iam.googleapis.com iamcredentials.googleapis.comOperation "operations/acat.p2-49535911505-796bcf79-a23b-48eb-8b1a-43209e57fe63" finished successfully. -
Create the Service Account.
gcloud iam service-accounts create github-actions --display-name "GitHub Actions Service Account"Created service account [github-actions]. -
Give the SA the required role(s).
gcloud projects add-iam-policy-binding vcluster-pipeline \
  --member "serviceAccount:[email protected]" \
  --role "roles/editor"
Updated IAM policy for project [vcluster-pipeline]. bindings: - members: - serviceAccount:[email protected] role: roles/editor - members: - user:[email protected] role: roles/owner etag: BwYobXrNz_w= version: 1 -
Create a Workload Identity Pool to use by the GitHub Action.
gcloud iam workload-identity-pools create "github-actions" \
  --project="vcluster-pipeline" \
  --display-name="GitHub Actions Pool"
Created workload identity pool [github-actions]. -
Create the associated Workload Identity Pool Provider.
gcloud iam workload-identity-pools providers create-oidc "github-provider" \ --project="vcluster-pipeline" \ --workload-identity-pool="github-actions" \ --display-name="GitHub Provider" \ --attribute-mapping="google.subject=assertion.sub,attribute.actor=assertion.actor,attribute.repository_owner=assertion.repository_owner,attribute.repository=assertion.repository" \ --issuer-uri="https://token.actions.githubusercontent.com" \ --attribute-condition="assertion.repository_owner == 'ajavageek'" #a- Previously, a condition wasn't necessary, but it is now. Here, the condition asserts that the request must come from a repository that belongs to
ajavageek.
Created workload identity pool provider [github-provider]. - Previously, a condition wasn't necessary, but it is now. Here, the condition asserts that the request must come from a repository that belongs to
-
Finally, bind the previously created SA to the WIP.
gcloud iam service-accounts add-iam-policy-binding \
  "[email protected]" \
  --project="vcluster-pipeline" \
  --role="roles/iam.workloadIdentityUser" \
  --member="principalSet://iam.googleapis.com/projects/49535911505/locations/global/workloadIdentityPools/github-actions/*"
Updated IAM policy for serviceAccount [[email protected]]. bindings: - members: - principalSet://iam.googleapis.com/projects/49535911505/locations/global/workloadIdentityPools/github-actions/* role: roles/iam.workloadIdentityUser etag: BwYobaJgpTw= version: 1
We can now manage the vcluster-pipeline Cloud project from a GitHub workflow hosted on any repository that belongs to ajavageek by impersonating the github-actions SA. Let's configure the GitHub workflow to make use of it.
Working within the GitHub workflow
Using the authentication setup above within the GitHub workflow requires the following small step:
      - name: Authenticate on Google Cloud
        uses: google-github-actions/auth@v2
        with:
          workload_identity_provider: projects/49535911505/locations/global/workloadIdentityPools/github-actions/providers/github-provider #1
          service_account: [email protected] #2
- The full path to the WIPP we created above. For reference, the pattern is
projects/$PROJECT_ID/locations/global/workloadIdentityPools/$WORKLOAD_ID_POOL_NAME/providers/$WORKLOAD_ID_POOL_PROVIDER_NAME - The "email" of the SA we created
The above step authenticates the GitHub workflow on Google Cloud. However, we must also interact with the GKE instance, which sits at another abstraction level. We can leverage the above to create a kubeconfig, which transparently can be used in all further GKE interactions.
      - name: Set GKE credentials
        uses: google-github-actions/get-gke-credentials@v2
        with:
          cluster_name: minimal-cluster                                       #1
          location: europe-west9                                              #2
- Name of the cluster we want to use, i.e., the one we created above
- Its location
It's time to pause and analyze what we achieved so far. We implemented steps 1, 3, and 4 of our initial plan:
- Create and configure a Google Kubernetes Engine instance
- Allow the GitHub workflow to use the GKE instance
- Build the Docker image and store it in the GitHub Docker repo
We still need to:
- Create a Kubernetes manifest for the app
- Install the PostgreSQL Helm chart
- Apply our app manifest
- Finally, run the end-to-end test
Create a Kubernetes manifest
I'll keep the manifest pretty simple in the context of this blog post and limit myself to a single pod Deployment and a load-balancer Service.
apiVersion: apps/v1
kind: Deployment                                                              #1
metadata:
  name: vcluster-pipeline
  labels:
    type: app
    app: vcluster-pipeline
spec:
  replicas: 1
  selector:
    matchLabels:
      app: vcluster-pipeline
  template:
    metadata:
      labels:
        type: app
        app: vcluster-pipeline
    spec:
      containers:
        - name: vcluster-pipeline
          image: ghcr.io/ajavageek/vcluster-pipeline:latest                   #2
          envFrom:
            - configMapRef:                                                   #3
                name: postgres-config
      imagePullSecrets:
        - name: github-docker-registry                                        #4
---
apiVersion: v1
kind: Service
metadata:
  name: vcluster-pipeline
spec:
  type: LoadBalancer                                                          #5
  ports:
    - port: 8080
      targetPort: 8080                                                        #6
  selector:
    app: vcluster-pipeline
- Our boring single-pod
Deployment - First challenge: each PR stores a different image, with the tag being the GitHub run ID.
- Second challenge: the PostgreSQL parameters are set at runtime. We get them from a
ConfigMap, which we'll see later how to create - Third challenge: the GitHub Docker Registry is private. We need to set a secret to pull the created image.
- Fourth and last challenge: what will the URL of the app on GKE be for running our test?
- Randomizing the port is trouble; keep it a constant
Let's address each of these challenges.
Setting the correct GitHub image tag
When building the image, we set the image name to a constant, vcluster-pipeline, but we used the GitHub run ID as the version tag. This way, we considerably limit the probability of one image PR overriding another. This approach creates an issue down the pipeline: how do we reference this runtime-assigned variable in the manifest created during development? The answer is Kustomize.
Kustomize introduces a template-free way to customize application configuration that simplifies the use of off-the-shelf applications.
In the same directory as the manifest, we set the customization file:
apiVersion: kustomize.config.k8s.io/v1beta1
kind: Kustomization
resources:
  - vcluster-pipeline.yaml
images:
  - name: ghcr.io/ajavageek/vcluster-pipeline                                 #1
    newTag: github.run_id
- Instruct Kustomize to replace the tag with the static value here.
The string github.run_id is only a placeholder. We need to change it to the actual GitHub workflow run ID.
In the workflow, we apply the manifest like this:
      - name: Edit image tag with GitHub Run ID
        run: (cd kubernetes && kustomize edit set image ghcr.io/ajavageek/vcluster-pipeline=:${{github.run_id}}) #1
      - name: Deploy Kustomized manifest to Google Cloud
        run: kubectl apply -k kubernetes                                      #2
- Change the image to the full registry + name + dynamic image tag in the Kustomization file
- Apply the manifest with Kustomize
One could easily replace Kustomize with a utility such as sed for minor changes on the manifest. However, for bigger ones, I'd advise using Kustomize or a similar Cloud Native tool.
Accessing the private GitHub registry from GKE
Our next challenge is to access the private GitHub registry from the GKE instance. We can work around this challenge by making the registry public, but I recommend not doing so. By default, your images should be private to prevent hackers from looking at your image internals and listing all the CVEs it contains.
That being settled, we should follow the nominal path: create a Kubernetes secret that allows GKE to download the image.
      - name: Create Docker Registry Secret
        run: |
          kubectl create secret docker-registry github-docker-registry \      #1
            --docker-server=${{ env.REGISTRY }} \                             #2
            --docker-email="[email protected]" \                             #3
            --docker-username="${{ github.actor }}" \                         #4
            --docker-password="${{ secrets.GITHUB_TOKEN }}" \                 #5
            --dry-run=client -o yaml | kubectl apply -f -                     #6
kubectl create secret docker-registryis the command to create a Docker registry secret.github-docker-registryis the value we gave in theDeploymentmanifest to theimagePullSecret- We set the registry again, a reason why it's a good idea to make it an environment variable, in case we migrate
- Anything you'd like. I didn't see any benefit in using a unique email per run
- Set the username to the GitHub actor running the workflow
- Set the password to the GitHub token. Reminder:
secrets.GITHUB_TOKENis a built-in secret that you don't need to declare explicitly - Print the secret to the standard out, but then pipe it to the
kubectlcommand, i.e., apply theSecret
Get the PostgreSQL connection parameters
We should first install PostgreSQL. To ease our lives, we can rely on a Helm Chart.
      - name: Schedule PostgreSQL
        run: helm install postgresql oci://registry-1.docker.io/bitnamicharts/postgresql --values kubernetes/values.yaml
The values.yaml file is tailored for simplicity.
fullnameOverride: postgres
auth:
  user: postgres
  password: root
  postgresPassword: roottoo
primary:
  persistence:
    enabled: false                                                            #1
- In the context of testing a PR, keeping everything in the pod isn't a bad idea, but your mileage may vary
At this point, we add a step to create the necessary ConfigMap from the data in the file:
      - name: Set config map from values.yaml
        run: |
          kubectl create configmap postgres-config \
            --from-literal="SPRING_FLYWAY_URL=jdbc:postgresql://$(yq .fullnameOverride kubernetes/values.yaml):5432/" \
            --from-literal="SPRING_R2DBC_URL=r2dbc:postgresql://$(yq .fullnameOverride kubernetes/values.yaml):5432/" \
            --from-literal="SPRING_R2DBC_USERNAME=$(yq .auth.user kubernetes/values.yaml)" \
            --from-literal="SPRING_R2DBC_PASSWORD=$(yq .auth.password kubernetes/values.yaml)"
Getting the external deployed app IP
We have installed the PostgreSQL Helm Chart at this stage and applied our app's manifest. The latter connects to the former. The last remaining bit is to run the end-to-end test that uses the endpoint. While we know the path, we need the base URL. Because we configured the Service to be of type LoadBalancer, GKE is responsible for setting it.
The naive approach is to query it and set an environment variable:
      - name: Retrieve LoadBalancer external IP
        run: |
          APP_BASE_URL="$(kubectl get service vcluster-pipeline -o jsonpath='{.status.loadBalancer.ingress[0].ip}'):8080"
          echo "APP_BASE_URL=$APP_BASE_URL" >> $GITHUB_ENV
          echo "External IP is $APP_BASE_URL"
Unfortunately, there's a high chance that it doesn't work: when the step runs, Google Cloud hasn't assigned the IP yet. We must keep querying until we get the IP or until we run too many times.
      - name: Retrieve LoadBalancer external IP
        run: |
          for i in {1..10}; do                                                #1
            EXTERNAL_IP=$(kubectl get service vcluster-pipeline -o jsonpath='{.status.loadBalancer.ingress[0].ip}')
            if [ -n "$EXTERNAL_IP" ]; then
              break                                                           #2
            fi
            echo "Waiting for external IP..."
            sleep 10                                                          #3
          done
          if [ -z "$EXTERNAL_IP" ]; then                                      #4
            echo "Error: External IP not assigned to the service" >&2
            exit 1
          fi
          APP_BASE_URL="http://${EXTERNAL_IP}:8080"
          echo "APP_BASE_URL=$APP_BASE_URL" >> $GITHUB_ENV                    #5
          echo "External IP is $APP_BASE_URL"
- Repeat at most ten times
- Exit the loop if we get the IP
- Wait for ten seconds
- If we didn't get the IP after the number of loops times sleep time, exit the step with a non-success exit code
- Store the IP in the GitHub workflow environment
Running the end-to-end test
Finally, we can run the end-to-end test. Because we ran the unit test in a previous step, it's unnecessary and a waste of time and resources. We could configure it to run a second time on Kubernetes, but it doesn't bring any value. We should run integration tests without running unit tests. Because it's not how Maven works, we must be creative:
      - name: Run integration tests
        run: ./mvnw -B verify -Dtest=SkipAll -Dsurefire.failIfNoSpecifiedTests=false
The output should look like the following:
[INFO] -------------------------------------------------------
[INFO]  T E S T S
[INFO] -------------------------------------------------------
[INFO] Running ch.frankel.blog.vclusterpipeline.VClusterPipelineIT
12:47:13.094 [main] INFO ch.frankel.blog.vclusterpipeline.VClusterPipelineIT -- Using base URL: http://34.163.223.245:8080
[INFO] Tests run: 1, Failures: 0, Errors: 0, Skipped: 0, Time elapsed: 2.494 s -- in ch.frankel.blog.vclusterpipeline.VClusterPipelineIT
[INFO]
[INFO] Results:
[INFO]
[INFO] Tests run: 1, Failures: 0, Errors: 0, Skipped: 0
[INFO]
[INFO]
[INFO] --- failsafe:3.5.2:verify (default) @ vcluster-pipeline ---
[INFO] ------------------------------------------------------------------------
[INFO] BUILD SUCCESS
[INFO] ------------------------------------------------------------------------
[INFO] Total time:  13.013 s
[INFO] Finished at: 2025-01-06T12:47:16Z
[INFO] ------------------------------------------------------------------------
Discussion
In this post, we achieved several milestones toward the end-to-end testing goal. We built the app Docker image, stored it on the GitHub registry, installed the PostgreSQL Helm Chart and the app on GKE, and successfully ran the test. Yet, if you implement this already-quite-long-process in your organization, you may experience some shortcomings:
- I managed the cluster upstream to avoid wasting time in the pipeline. It means the cluster is up all the time and, thus, incurs additional costs; the bigger the cluster, the higher the costs.
- Since we share the same cluster, we can't include cluster-wide changes in our PRs. For example, there's no way we can do regression testing after upgrading a CRD to a newer version, even if we isolate each
Deploymentin a dedicated namespace. On the good side, since each PR gets itsServiceobject, GKE assigns a different IP to each. It's possible to run multiple PRs in parallel; each one gets a different IP.
The first item is an engineering decision, depending on the context. Factors include the time it takes to run workflows (setup and test), the time it takes to set up a cluster, how many parallel workflows will run, etc. With the right auto-scaler, configuring an upstream GKE is a good default.
For the second item, you can only achieve complete isolation with different clusters, which defeats the purpose. The alternative is vCluster: in the next post, I'll detail how you can leverage it in your GitHub workflow.
The complete source code for this post can be found on GitHub:
To go further:
- Deploying to Google Kubernetes Engine
- google-github-actions/auth
- docker/metadata-action
- docker/build-push-action
Originally published at A Java Geek on February 16th, 2025